
Information Requests in Workflows
Put an information request in a workflow and it goes to the client on its own when the task reaches that step, with the same queries and documents every time. This guide shows how to set the step up and follow the client's progress from the task. For the request itself, how clients answer and how you review, see Sending an Information Request.
Why put it in a workflow
If you ask every client for the same things at the same point in the work (the records at the start of a year end, the questions before a VAT return), the request belongs in the workflow. Each task then sends it at the right moment, with the client's details filled in, and nobody has to remember to.
The step stays in progress while the client answers, and the steps that depend on it wait. When the last item is resolved, the request completes and so does the step, so the work carries on.
New to steps? The Understanding Tasks, Recurring Tasks and Workflows guide explains how they fit together.
Adding the step
Open the workflow, press Add Step on the group it belongs in and choose Information Request. Give the step a name for your team (“Send year end queries”), then fill in the request the client will see:
- Request Title and Description: what the client reads at the top of the request. Both take tokens, such as the client's name, through the { } button.
- Client Deadline (days from sending): the deadline is set this many days after the request goes out.
- Chase for response: how often to remind the client while anything is outstanding.
- Auto send: on, the request goes out as soon as the task reaches the step. Off, it waits for someone on the task to press Preview and Send.
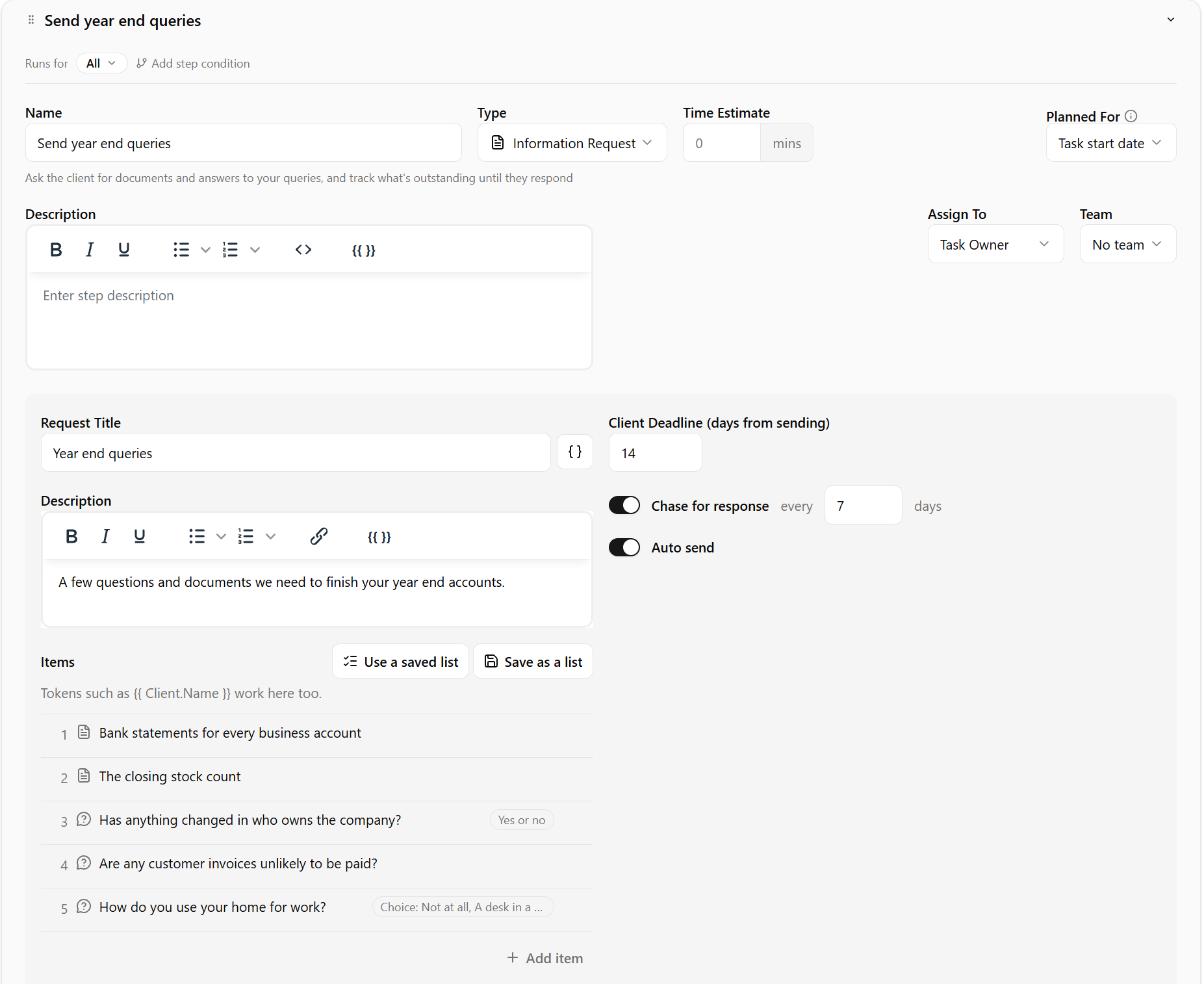
The step's items
Under Items, add the queries and documents every client should be asked at this step, just as on a request: + Add item, then choose Query or Document and, for a query, the kind of answer. New items on a step start as documents.
Item text takes the same tokens as the title, such as {{ Client.Name }}, filled in for each client when the request goes out. Use a saved list adds the items of one of your Info Request Lists, and Save as a list keeps the step's items as a new one.
One item for each of a client's accounts
Some items are the same for every client except for a list that differs from client to client: a statement for each bank account, say, or a return for each property. Keep that list on the client, in a custom field, and the step adds one item for each line of it.
Make a Long Text client field ("Bank accounts", for example) and put one account on each line for each client. Then, on the step, write the item with {{ Line }} where the account's name goes, and set Repeat under the item's text to Each line of Bank accounts:
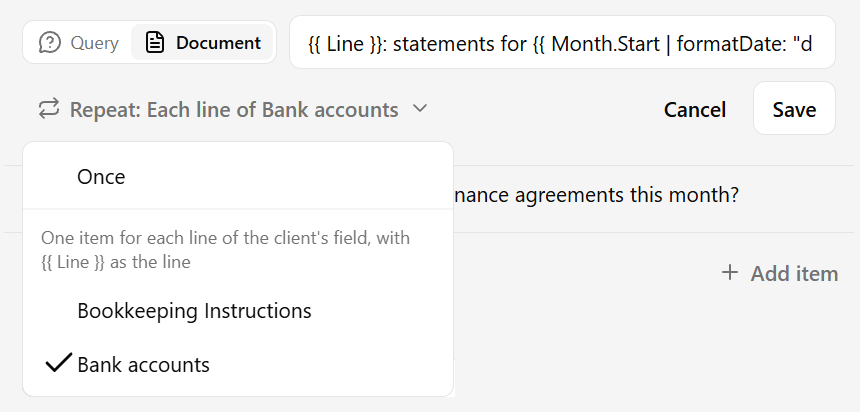
{{ Line }}: statements for {{ Month.Start | formatDate: "d MMMM yyyy" }} to {{ Month.End | formatDate: "d MMMM yyyy" }}
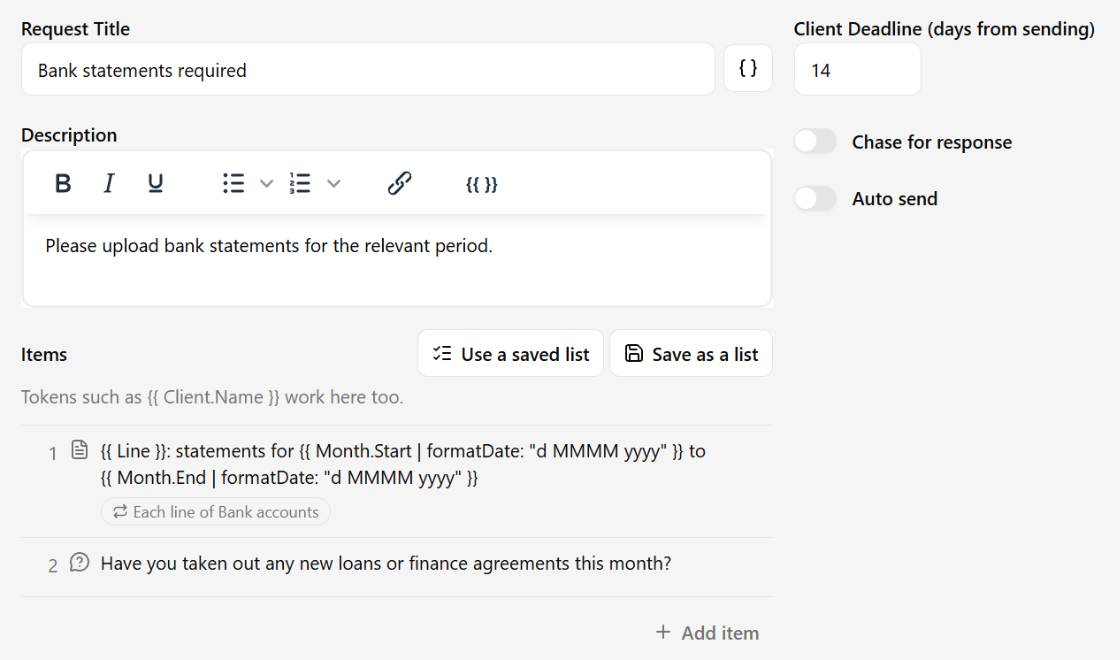
For a client whose field reads "Barclays Current Account" and "Barclays Deposit Account", the November request then asks for two documents: "Barclays Current Account: statements for 1 November 2026 to 30 November 2026", and the same for the deposit account. The dates move on with each period, and a client who opens a new account only needs a line adding to the field.
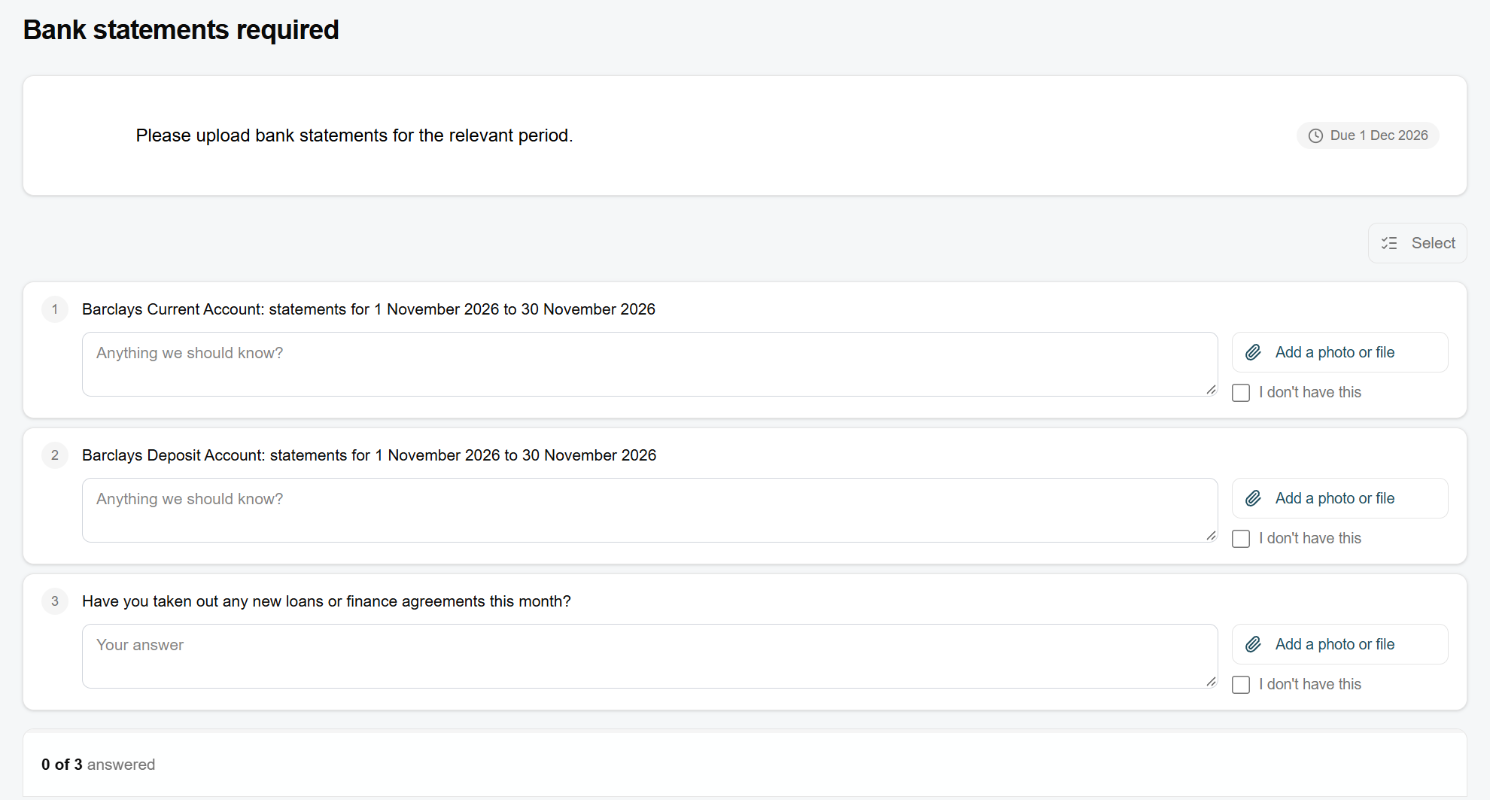
- A Multi-select field works too: the item repeats once for each choice ticked for the client.
- A client with nothing in the field gets none of that item. The step's other items still go.
- The repeated items sit where the item sits in the list, and you can still add or change items on the draft before it goes.
Who it goes to, and when
The step's recipient settings pick who it goes to: the client's contacts, or other addresses you add. Send from picks the mailbox it comes from, as for other client emails.
If the step can't find anyone to send to (the client has no email, say), it stops and shows why. Press Preview and Re-send on the task, add an address in the email, and send it from there.
When the items change every time
Bank queries are different for every client and every period, so they can't live on the step. Leave the step's items empty (or keep only the ones that never change) and turn Auto send off.
On the task, the step then shows Add items beside Preview and Send. It opens the step's draft request, where you paste this period's bank lines or pick them from the client's books, then press Send Request to Client. Sending it there marks the step as sent, just as its own send would.
A list that changes from client to client but not from period to period, such as their bank accounts, doesn't need this: keep it in a custom field and repeat the item for each line.
Following it on the task
Once the request has gone, the step shows how far the client has got: how many items are outstanding, waiting for review and resolved, with a bar in the same colours, and when the next chase goes. Click it to open the request and review the answers.
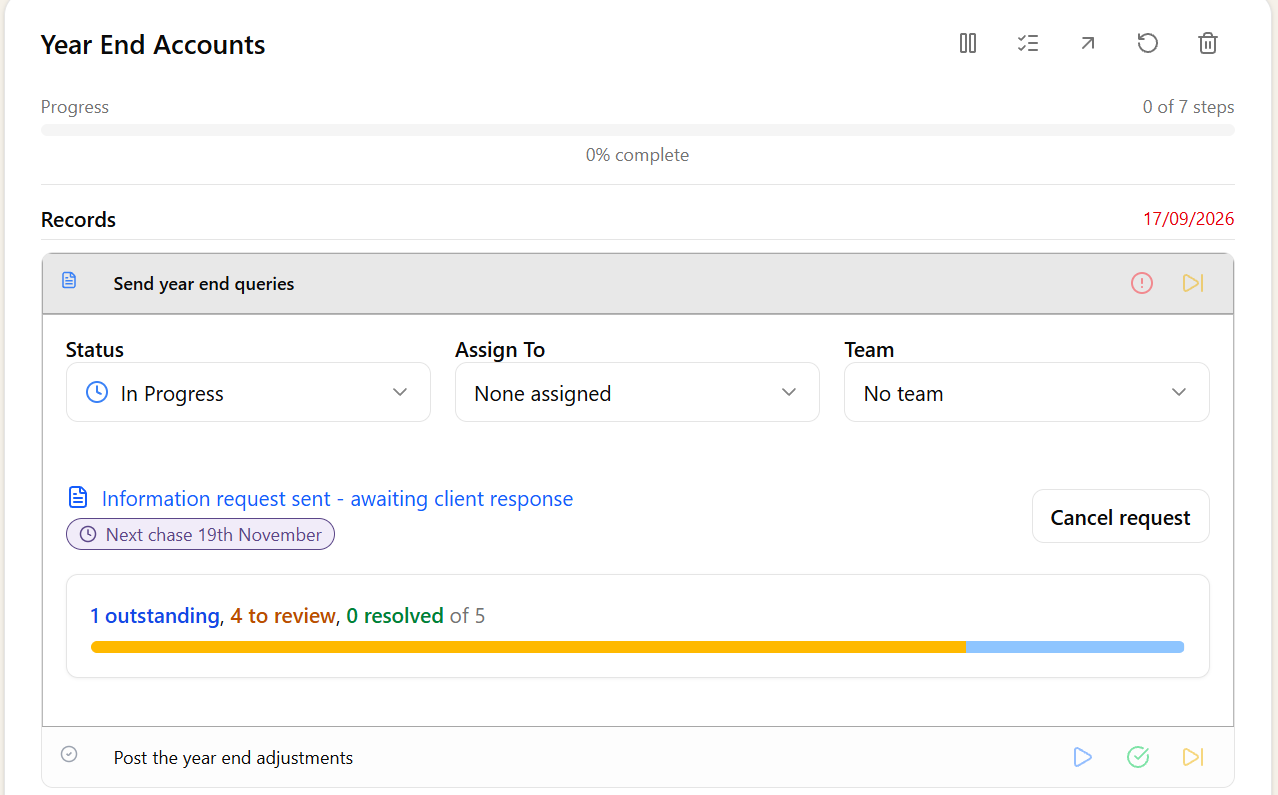
You're told when the client sends answers. Cancel request on the step stops the request and the chasing if it's no longer needed.
When you resolve the last item, the request completes and the step is marked as completed for you. The steps that were waiting on it can then be started, and any of them set to run automatically (another email to the client, say, or a stage change) start straight away.
Tips
- Start from a list. Build your checklist once as an Info Request List, then add it to every workflow that needs it.
- Put the step early. The sooner the request goes, the sooner the answers are in; make the steps that need the records depend on it.
- Mix fixed and per-client items. Keep the standard documents on the step, turn Auto send off, and add each client's bank queries before it goes.